Student List Screen
After a successful file import, the Student List screen displays the imported students. The screen also shows the number of records that were added to the list and the total number of students in the list.
Search Function
To search for a specific student, complete the following steps:
-
Type the first three characters of a first name, last name, or the SSID in the Search box, as shown in figure 1.
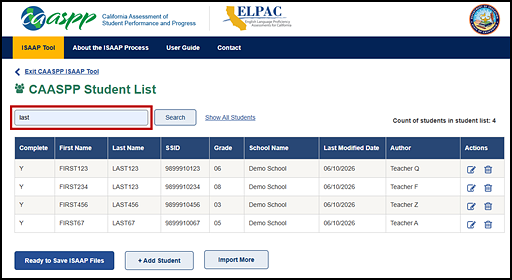
Figure 1. Search box on the Student List screen
-
Select the [Search] button. This returns all records matching the search criteria. The count of students returned in the list will be displayed, as shown in figure 2.
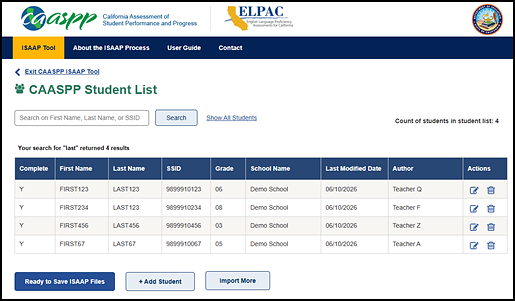
Figure 2. Student results on the Student List screen after selecting the [Search] button
-
To redisplay all rows, select the [Show All Students] link. The count of all students in the list will be displayed, as shown in figure 3.
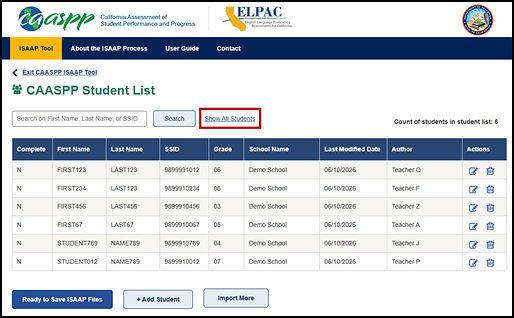
Figure 3. Student count on the Student List screen from [Show All Students] link
Student List Row Icons
Each row on the Student List screen has an Actions column that contains two icons: an [Edit Student] pencil [ ] icon and a [Delete] trash can [
 ] icon.
-
Select the [Edit Student] pencil [
] icon to edit the student information or accessibility resources for the SSID on the row, as shown in figure 4.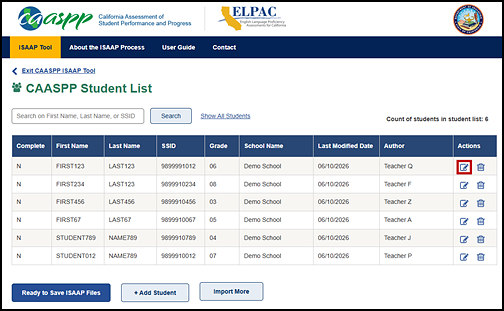
Figure 4. [Edit Student] icon in the Actions column of the Student List screen
-
The student information will then be displayed on the Student Detail screen, as shown in figure 5.
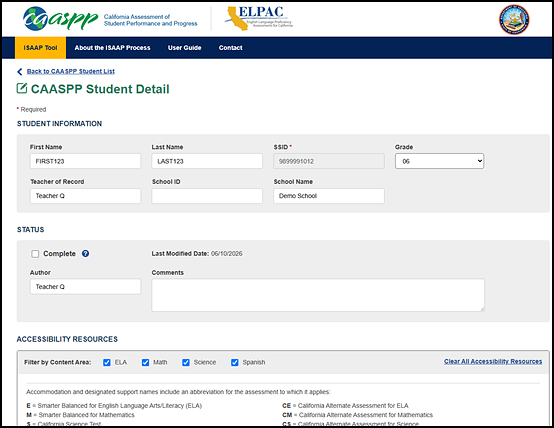
Figure 5. Student Detail screen
-
Select the [Delete] trash can [
] icon to delete the ISAAP for the SSID, as shown in figure 6.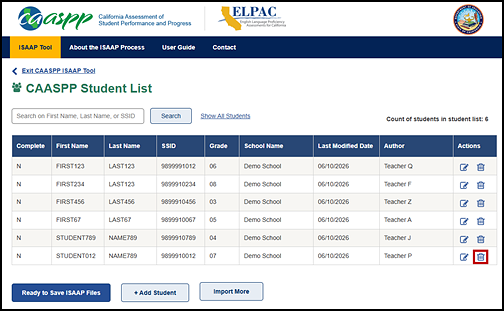
Figure 6. [Delete] icon in the Actions tab of the Student List screen
-
If the [Delete] trash can [
] icon is selected, a pop-up message will be displayed for the user to confirm the deletion, as shown in figure 7.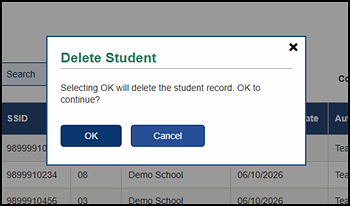
Figure 7. Delete Student dialog box on the Student List screen
- Select the [OK] button to continue with the deletion or select the [Cancel] button to cancel the delete action. Deleting a row will remove the student’s ISAAP from the list.
-
A message will indicate that one student was deleted, as shown in figure 8.
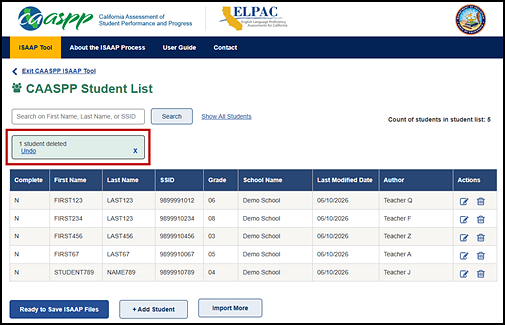
Figure 8. Student Deleted message on the Student List screen
-
- Immediately after being deleted, the student record can be restored if it was deleted in error.
- Select the [Undo] link. This restores the student record to the list.
Ready to Save ISAAP Files
When all students and accessibility resources have been added and edited, or the session is over, select the [Ready to Save ISAAP Files] button to display the Save ISAAP Files screen.
Add Students
To add additional students to the list, select the [+ Add Student] button, as shown in figure 9.

Figure 9. [+ Add Student] button on the Student List screen
The Student Detail screen, where new student records can be added, will then be displayed, as shown in figure 10.
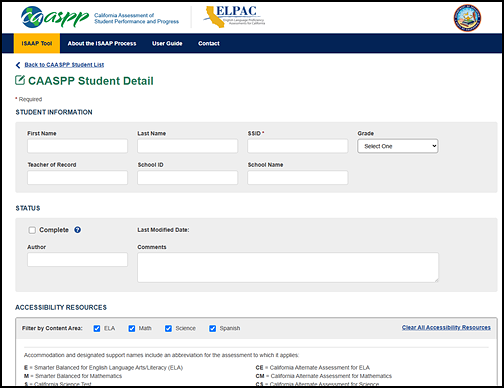
Figure 10. Student Detail screen with blank fields for adding student information
Import More Students
To import more student records from an external file, select the [Import More] button, as shown in figure 11.
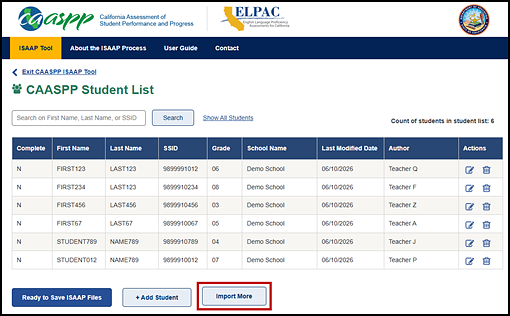
Figure 11. [Import More] button on the Student List screen
The Import Accessibility Resources screen will then be displayed, as shown in figure 12.
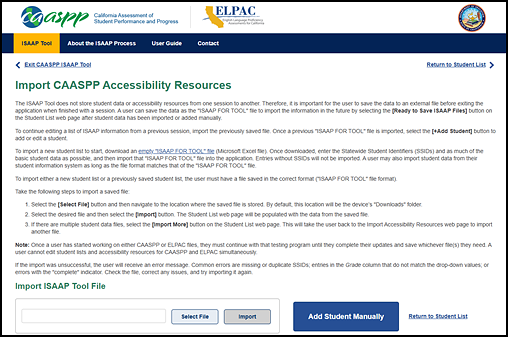
Figure 12. Import Accessibility Resources screen