My Reports
The My Reports page includes Printable Reports, Custom Aggregate Reports, and District/School Exports. Access to these reports is dependent on the user’s TOMS role permissions.
A user can access the My Reports page by selecting the [My Reports] button from the system header bar (figure 1).

Figure 1. My Reports Button
The My Reports page (figure 2) contains a table with two tabs, [My Reports] and [Saved Queries].
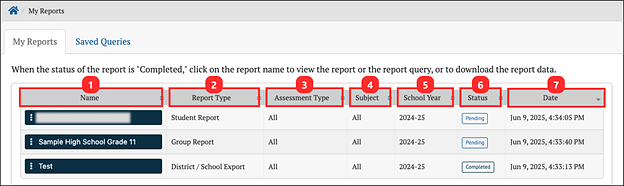
Figure 2. My Reports Page
The [My Reports] tab displays a table containing all the reports run by a user. The [Saved Queries] tab displays all report queries saved by the user. Both tables contain the following columns:
- Name: Name of the report
- Report Type: Defines if it is an individual, group, or aggregate report
- Assessment Type: Indicates if the report includes summative assessments, IABs/IAs, or ICAs
- Subject: Indicates which subject(s) the report includes
- English language arts/literacy (ELA)
- Math
- California Science Test (CAST)
- California Alternate Assessment for ELA (CAA ELA)
- California Alternate Assessment for Math (CAA Math)
- California Alternate Assessment for Science (CAA Science)
- California Spanish Assessment (CSA)
- English Language Proficiency Assessments for California (ELPAC)
- Summative Alternate English Language Proficiency Assessments for California (Alternate ELPAC)
- School Year: Year(s) of data queried
- Status: Condition of the report’s processing (My Reports page only)
- Pending: The report is still being processed.
- Completed: The report is ready to be displayed or downloaded.
- Failed: The report failed to be completed.
- No Results: The query did not return any results.
- Date: Date the report was created, or the saved query was last updated
Report Options
Selecting the Context Menu three-dot icon [⋮] on a report name opens a context menu for that report (figure 3). For example, if the report type is an Aggregate Report, then the context menu has the following options:
- [View Report]: Display the report on the Custom Aggregate Report page. (Refer to the Custom Aggregate Reports section.)
- [Download Report Data]: Download the report to a CSV file on the user’s computer.
- [View Report Query]: Display the query used to generate the report in the Custom Aggregate Query page section. (Refer to the Custom Aggregate Reports section.)
- [Save Report Query]: Save the query to be used to create another report even after this report is deleted. Saved queries appear in the [Saved Queries] tab described in the Saved Queries section.
- [Delete Report]: Delete this report from the My Reports list.
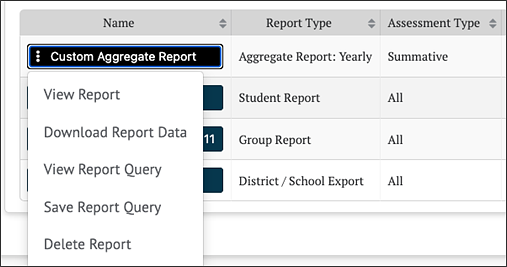
Figure 3. Custom Aggregate Report Context Menu Options
If the report type is a District/School or Printed Report, the same context menu options are available, except for the [View Report] option (figure 4).
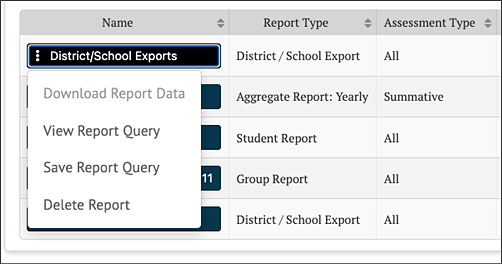
Figure 4. Context Menu for Reports Other Than Aggregate Reports
Saved Queries
Saved queries allow reports to be re-created at any time, with query modifications, even after the original report that the query was saved from has been deleted. All queries saved by the user appear on the [Saved Queries] tab that can be found next to the [My Reports] tab discussed in the My Reports section. This tab is accessed by selecting the [My Reports] button on the system header bar and then selecting the [Saved Queries] tab (figure 5).
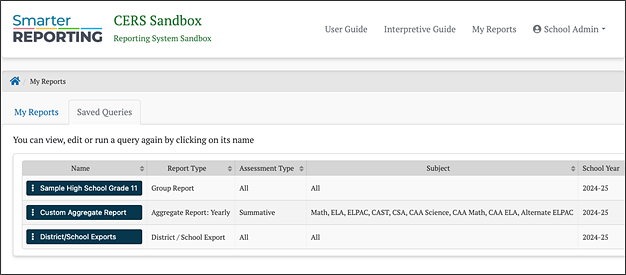
Figure 5. Saved Queries Tab
Saving a Query
To create a saved query, select Save Report Query from the context menu of an existing report on the [My Reports] tab (figure 6).

Figure 6. Save Report Query Option
The query is added to the [Saved Queries] tab with the same name as the report (figure 7).
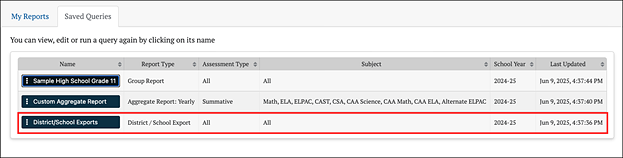
Figure 7. Query Added to Saved Query Tab
Saved Query Options
Selecting the Context Menu three-dot icon [⋮] on a saved query name opens a context menu for the query (figure 8).
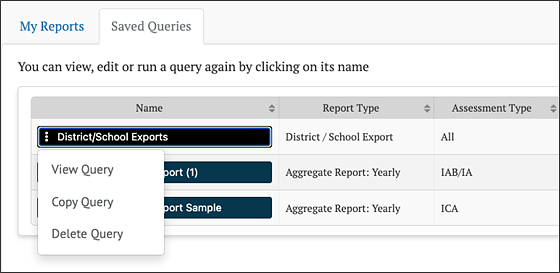
Figure 8. Saved Query Context Menu
The Context Menu has the following options:
- [View Query]: Display the query in the appropriate report form. This view is similar to the original report creation interface for that report type and includes a [Save Query] button to save any changes made to the query.
- [Copy Query]: Create a duplicate of the query with a name that is a variation on the original query’s name. For example, if the query is named “Sample Report,” the copied query is then named “Sample Report (1).” The name can be changed by viewing the new query and saving it with a different name.
- [Delete Query]: Delete the query. This action does not delete the original report from which the query was saved.
If the [View Query] button is selected from the context menu of the “Sample Report” custom aggregate report shown in figure 8, then the Custom Aggregate Report edit page appears, prepopulated with the values from the saved query. Any part of the query can be modified from this page (figure 9).
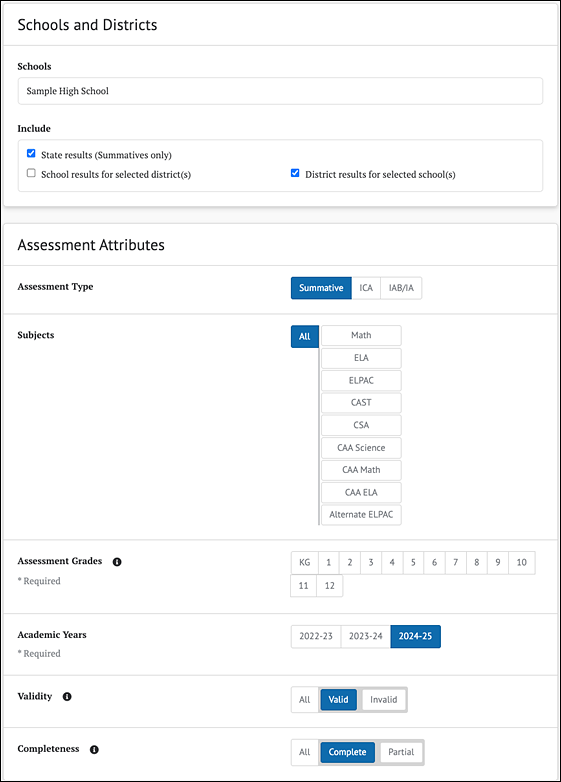
Figure 9. Custom Aggregate Report Edit
When viewing a saved query, a [Save Query] button (figure 10) will appear in the Report Review panel. This button is disabled (grayed out) until at least one query parameter is changed or the report is given a new name.
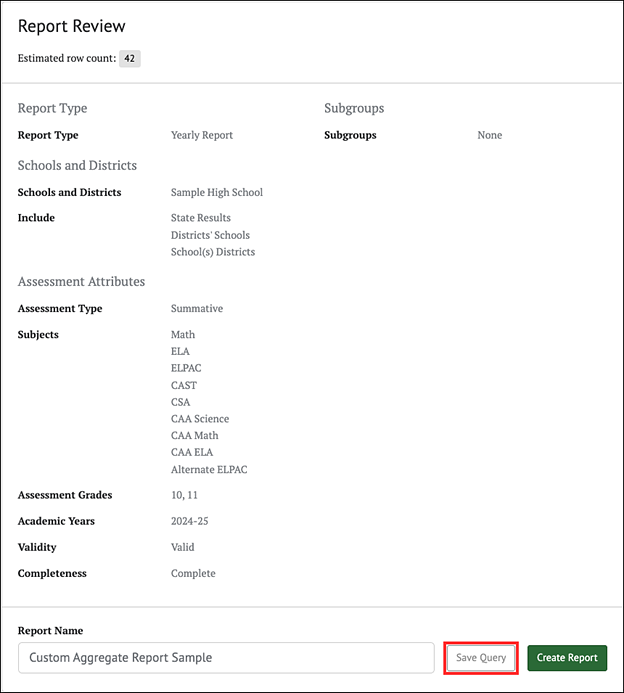
Figure 10. Save Query Button in Report Review Panel
Selecting the [Save Query] button saves the edited query in place of the existing one. A message indicating a successful save appears briefly in the upper right of the screen (figure 11).

Figure 11. Successful Save Query Message
Saving the query does not navigate away from the edit page, which allows the user to select the [Create Report] button and immediately create a report based on the newly saved query.