Using the THSS
Step 1. Access the THSS
To access the THSS, TOMS logon credentials—username and password—are required.
- Open a web browser and navigate to the CAASPP & ELPAC Website.
-
Select the [Interim Assessments] button (figure 1) to navigate to the CAASPP and ELPAC Interim Assessments web page.
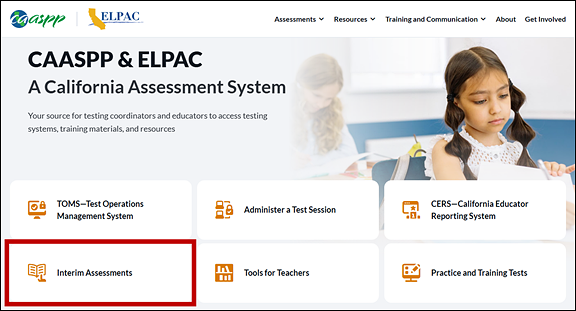
Figure 1. [Interim Assessments] button on the CAASPP & ELPAC Website
-
Select the [THSS—Teacher Hand Scoring System Logon] button (figure 2).
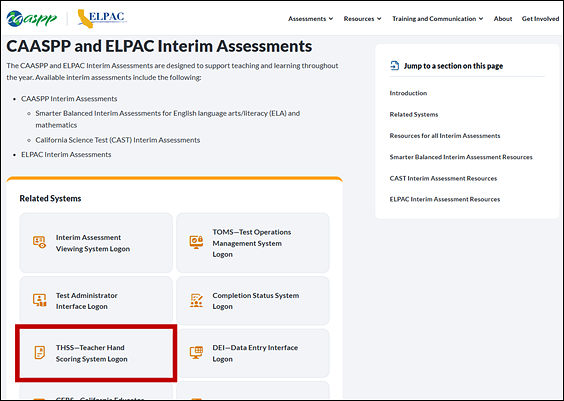
Figure 2. [THSS—Teacher Hand Scoring System Logon] button
-
Enter the required email address and password in the Email Address and Password fields on the Logon screen (figure 3), and then select the [Secure Logon] button.
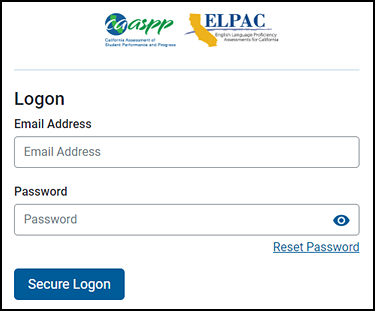
Figure 3. Logon screen
- If the password has been forgotten or otherwise needs to be reset, select the [Reset Password] link; instructions for how to proceed to reset it are found in the Resetting a Password subsection in the TOMS User Guide.
Step 2. Select School
After logging on, the system will direct users as follows:
-
Test administrators and test examiners assigned to one school will be sent to the THSS Dashboard screen directly; those with multiple roles will select a school and then select the [Continue] button (figure 4).
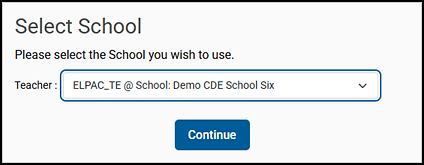
Figure 4. Select School screen—test administrators and test examiners
-
Site coordinators will be directed to select an option from the District drop-down list (figure 5). After selecting the site listing, the system moves the user to the THSS Dashboard screen.
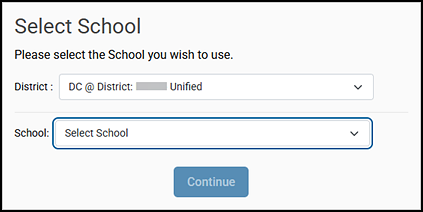
Figure 5. Select School screen—coordinators
- LEA coordinators will be directed to first select an option from the District drop-down list and then to select an option from the School drop-down list (figure 5). Select [Continue] to move on to the THSS Dashboard screen.
Step 3. Select Assessments to Score
After logging on, the scorer will be directed to the Dashboard screen (figure 6). The Dashboard view shows the test programs that have been assigned to the scorer and may include the Initial ELPAC. Assessments to score are listed in the Showing all assessments table.
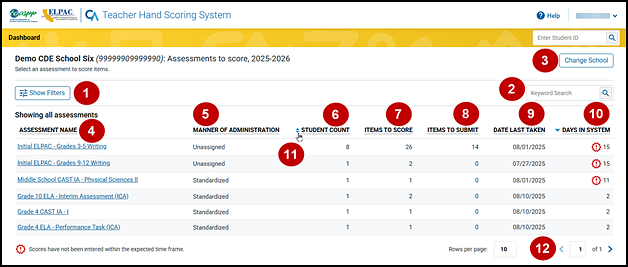
Figure 6. Showing all assessments table on the Dashboard screen
-
Select the [Show Filters] button to open the Filters overlay that can be used to select specific assessment groups (like ICAs or IABs) or a specific manner of administration (figure 7).
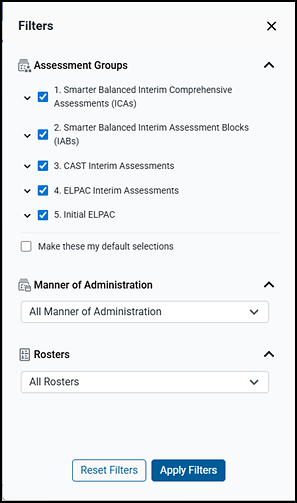
Figure 7. Filters
- Keyword Search—This field allows the scorer to search for an assessment or other criteria (such as “Nonstandardized”).
- [Change School] button—Select the [Change School] button to return to the Select School screen.
- Assessment Name—Access the selected assessment to score by selecting the link.
- Manner of Administration—This column indicates whether an interim assessment was administered as Nonstandardized or Standardized. “Unassigned” applies to the Initial ELPAC and does not apply to interim assessments.
- Student Count—This column indicates the number of students who took the assessment.
- Items to Score—This column indicates the number of items to be scored.
- Items to Submit—This column indicates the number of scored items to be submitted.
- Date Last Taken—This column indicates the last date the students took the assessment.
- Days in System—This column lists how long item responses for an assessment have been in the THSS awaiting scoring. Interim assessments that have been submitted to the THSS for seven or more days are indicated using the [Scoring Reminder]
 exclamation point icon.
 -
Sorting arrows—These arrows are used to sort the content of a column in ascending or descending order. They appear when hovering over the column name. Users can sort the screen by any of the column headers.
- Select a column header sorting arrow. The table lists the fields by that column in ascending order.
- To sort the column content in descending order, select the column header sorting arrow again.
- Navigation arrows—These arrows are used to view item responses on other pages if the item response list includes more assessments to score than what are shown currently on the screen.
Step 4. Select Item Responses to Score
After selecting the assessment in the Assessment Name column, the Assessment Scoring screen will appear (figure 8) The table on this screen is populated with the test items that are assigned to the scorer to be scored.
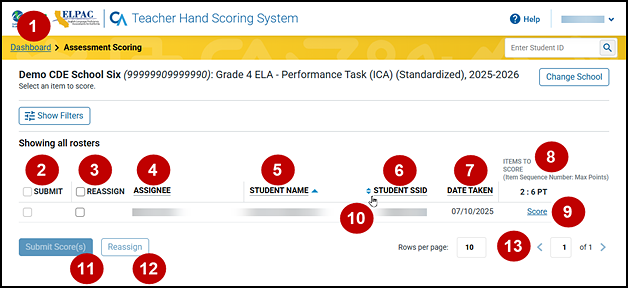
Figure 8. Assessment Scoring screen
- [Dashboard] link—Select the [Dashboard] link to return to the Dashboard screen.
- Submit—Boxes in this column remain suppressed until all the student’s item responses have been scored.
- Reassign—Boxes in this column are available to reassign scorers to item responses that are to be scored.
- Assignee—This column shows the name of the scorer to which the item response is assigned.
- Student Name—This column indicates the student’s name.
- Student SSID—This column indicates the student’s SSID.
- Date Taken—This column lists the date and time the student took the assessment.
- Items to Score—This section of columns is separated on the basis of the Item Sequence Number and Max Points. The [Score] link will change to the points earned number once an item response has been scored.
- [Score] link—This link provides the scoring status of the item. An assigned scorer can select this link to score the student’s response.
-
Sorting arrows—These arrows are used to sort the content of a column in ascending or descending order. They appear when hovering over the column name. Score managers can sort the screen by assignee, student name, student SSID, and date taken. Score managers can also sort the Assessment Scoring screen by the assigned scorer.
- Select a column header sorting arrow. The table lists the fields by that column in ascending order.
- To sort the column content in descending order, select the column header sorting arrow again.
- [Submit Score(s)] button—The button remains suppressed until the student’s assessment is scored. After a student’s assessment is scored and the Submit checkbox for one or more students has been selected, the user can select this button to submit scores for the student(s).
- [Reassign] button—This button, which is used to reassign item responses for scoring, remains suppressed until a Reassign checkbox is selected.
- Navigation arrows—These arrows are used to view item responses on other pages if the list of scores shows more than the designated number of rows of students per page.
Step 5. Score Item Responses
This subsection explains how to enter scores for responses.
In the Items to Score column of the Assessment Scoring screen (figure 8), select the [Score] link for the response. The Item Scoring screen appears, displaying the student response. Screen features, indicated in figure 9, include the following:
- Navigation arrows to move between items
- Drop-down list and navigation arrows to move between students
- A toggle to open the “Rubric & Resources” section
- A drop-down list to select a different language for the item and prompt, if available
- A toggle to view the item using the student’s test settings
- The “Item Score” section, where the scorer selects the number of points the student earned
- The “Scoring Notes” section, where the scorer can opt to add a note by selecting the [Add Note] button
-
The item stimulus, prompt, and response, which are blurred in figure 9 (The layout of the item can vary due to a variety of factors, including the interim assessment type, content area, item, and whether student settings were toggled.)
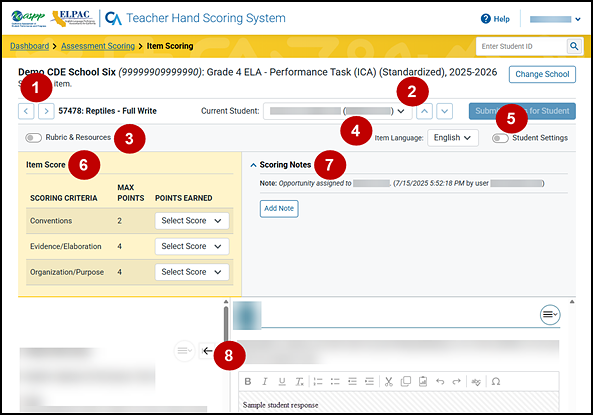
Figure 9. Item Scoring screen
Take these actions when navigating the Item Scoring screen:
-
To navigate to the Item Scoring screen for a different item, a scorer may use the Current Item navigation arrows (figure 10) or close out the item being scored by selecting the [Assessment Scoring] link at the top of the page to return to the list of assessments; and then selecting a [Score] link in an Items to Score column (figure 6).
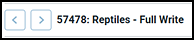
Figure 10. Navigation arrows to move between available items
-
Selecting the Current Student drop-down list or a navigation arrow next to the drop-down list will move to the next assigned student's item (figure 11). The list contains the full set of students; the arrows will scroll through the entire list of assigned students.

Figure 11. Options to move between students
- To enter a score for the response, select the Points Earned drop-down list to select a numerical score or a condition code, if applicable (figure 12). When a score is assigned or changed, it will be automatically saved and will appear in the appropriate Items to Score column on the Assessment Scoring screen. Note the following about the Points Earned list:
- A score in the list will not exceed the value shown in the Max Points column.
- Numerical score selections and condition codes within the list vary, depending on the interim assessment being scored.
-
Condition codes are not available for the CAST or ELPAC interim assessments.
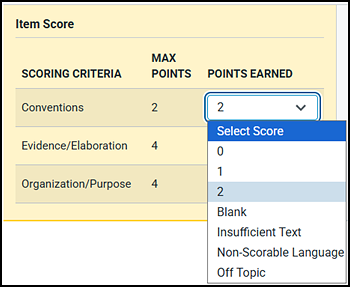
Figure 12. Points Earned drop-down list for a Smarter Balanced Interim Assessment
-
A collaboration feature in the THSS allows a scorer to add a note. Previous notes entered by other scorers cannot be edited, but new notes can be entered into the “Scoring Notes” section. Historical notes are preserved, including reassignment notes. Select the [Add Note] button to add a note (figure 13).
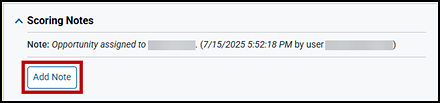
Figure 13. [Add Note] button in the “Scoring Notes” section of the Item Scoring screen
- After selecting the Rubric & Resources toggle (figure 14), the screen layout changes to allow the scorer to review resources appropriate for the grade level and assessment program. Select the toggle again to collapse this view. Information includes the following:
- Scoring notes
- Item details
- Item resource links (exemplars, anchor samples for each score point, rubric training guide)
- The rubric description
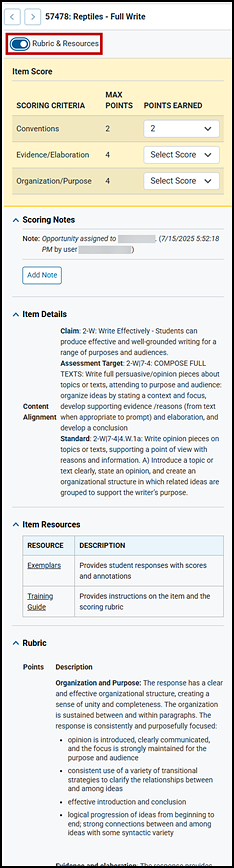
Figure 14. The “Rubric and Resources” section of the Item Scoring screen
-
Use the Item Language drop-down list to view the item and stimuli in a presentation language other than English if another language is available (figure 15). Options can include Spanish (for CAST and mathematics) and braille.
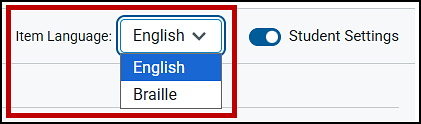
Figure 15. Item Language list
-
Select the Student Settings toggle to apply any assigned settings (such as print size) to the item (figure 16). Select the toggle again to return to a standard view.
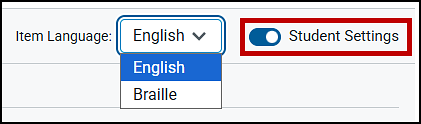
Figure 16. Student Settings toggle
-
View the item stimulus, prompt, and response section at the bottom of the Item Scoring screen (Secure item content is blurred in figure 17).

Figure 17. Item stimulus, prompt, and response section of the THSS
The three parts of the item the student accesses in the TDS is recreated in the THSS are as follows:
- Item prompt—A test question or stimulus presented to a student to elicit a response
- Item stimulus—Content such as passages, short scenarios, or source material provided to the student that give context for assessing student knowledge and skills
- Student response area—The designated area for the student’s response to the item prompt
Step 6. Reassign Responses (If Needed)
The THSS automatically assigns student responses for hand scoring to the test administrator or test examiner who administered the session in which the student’s assessment was completed. If a student started an assessment in one session and completed it in another, the response will be assigned to the test administrator or test examiner who administered the session in which the student completed the assessment.
Item responses can only be assigned to one scorer at a time, and only one score is saved for a student after it is submitted. An item response cannot be reassigned after the score is submitted.
Score managers at the school level (site CAASPP coordinators and site ELPAC coordinators) can reassign responses to scorers in a school. Those score managers associated with an LEA (LEA CAASPP coordinators or LEA ELPAC coordinators) can reassign responses to scorers within the LEA.
What follows is the process for score managers to reassign responses.
- Select the assessment being scored.
-
On the Assessment Scoring screen (figure 18), mark the checkbox in the Reassign column on the left for any student responses intended to be reassigned.
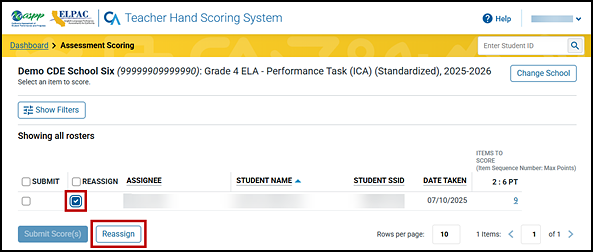
Figure 18. Reassign checkbox and button on the Assessment Scoring screen
-
Select the [Reassign] button at the bottom of the screen (figure 18). The Reassign to new scorer dialog box appears (figure 19).
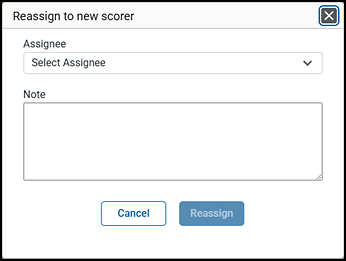
Figure 19. Reassign to new scorer dialog box
- Select a scorer from the Assignee drop-down list shown in (figure 19). Only users associated with the user’s school or LEA will appear.
- Enter text in the Note field in the Reassign to new scorer dialog box (figure 19). The THSS does not track reassignments, but details can be documented in the Note field along with other information for the next scorer. This note will appear in the “Scoring Notes” section of the Item Scoring screen.
- Select the [Reassign] button. The selected responses are reassigned to the selected scorer. The newly assigned scorer’s name will show as a note in the “Scoring Notes. section (figure 20); this display is available to score managers only. Note the following about scorer note options:
- For a scorer, once responses are reassigned, those responses are removed from the original scorer’s response list.
- The [Edit] pencil icon and [Delete] trash can icon appear only for the note’s originator and can be used to edit or delete a note.
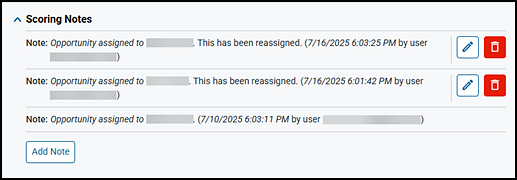
Figure 20. “Scoring Notes” section on the Item Scoring screen with reassignment notes
Step 7. Submit Student Responses
There are two ways to submit scores for a student: by selecting the [Submit Scores for Student] button on the Item Scoring screen; or by selecting the Submit checkbox and then the [Submit Score(s)] button on the Assessment Scoring screen.
-
After finishing entering scores for all student responses on the Item Scoring screen, select [Submit Scores for Student] (figure 21), to the right of the Current Student navigation arrows. Note that the [Submit Scores for Student] button remains suppressed until all the student’s responses are tentatively scored.

Figure 21. [Submit Scores for Student] button on the Item Scoring screen
-
Select the [Continue] button on the Score Submit Alert pop-up message box to submit the scores, or select [Cancel] to exit (figure 22).
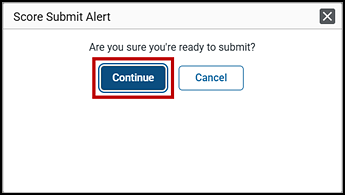
Figure 22. [Continue] button on the Score Submit Alert message, Item Scoring screen
- To navigate to the Item Scoring screen for a different student, select a [Score] link in the Items to Score column (figure 8) on the Assessment Scoring screen. The order of responses is determined by the sorting options chosen on the Assessment Scoring screen.
-
-
Alternatively, take the following steps to submit scored responses on the Assessment Scoring screen:
-
Mark the checkbox in the Submit column for one or more students whose responses have all been scored (figure 23). To select all responses, mark the checkbox next to the Submit header or each checkbox in a student row.
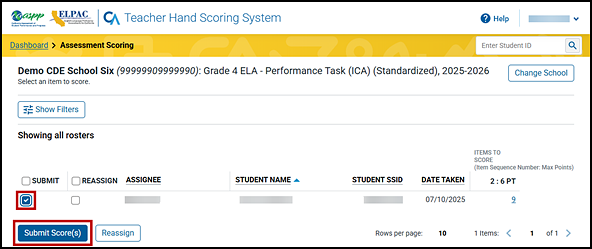
Figure 23. Submit scores on the Assessment Scoring screen
- Select the [Submit Score(s)] button (figure 23).
-
Select the [Continue] button on the Score Submit Alert pop-up message box to submit the scores, or select [Cancel] to exit (figure 24).
Figure 24. [Continue] button on the Score Submit Alert message, Assessment Scoring screen
-
Interim assessment score results are generally available within 20 minutes once all hand scoring has been completed. The results can be viewed in CERS. Because of regular quality-assurance processes and the high volume of testing during peak summative testing times, some results might require more than 20 minutes to populate in CERS.
Teachers will need permission, by way of a TOMS user role (such as Test Administrator, Test Examiner, or IA Administrator Only), to view test results for their student groups. Student groups are created and assigned by the LEA or site coordinator in CERS; refer to the Manage Student Groups section of the CERS User Guide for additional information on this process. Teachers who are unable to view their student groups should contact their school or LEA coordinator.
School administrators may view results for all students in the school, and LEA administrators may view results for all students in the LEA.